
A steel-and-glass pivot door: lightness built from weight
It seems to float. In reality, an elegant pivot door is a rigorous study of weight, tolerances and light.
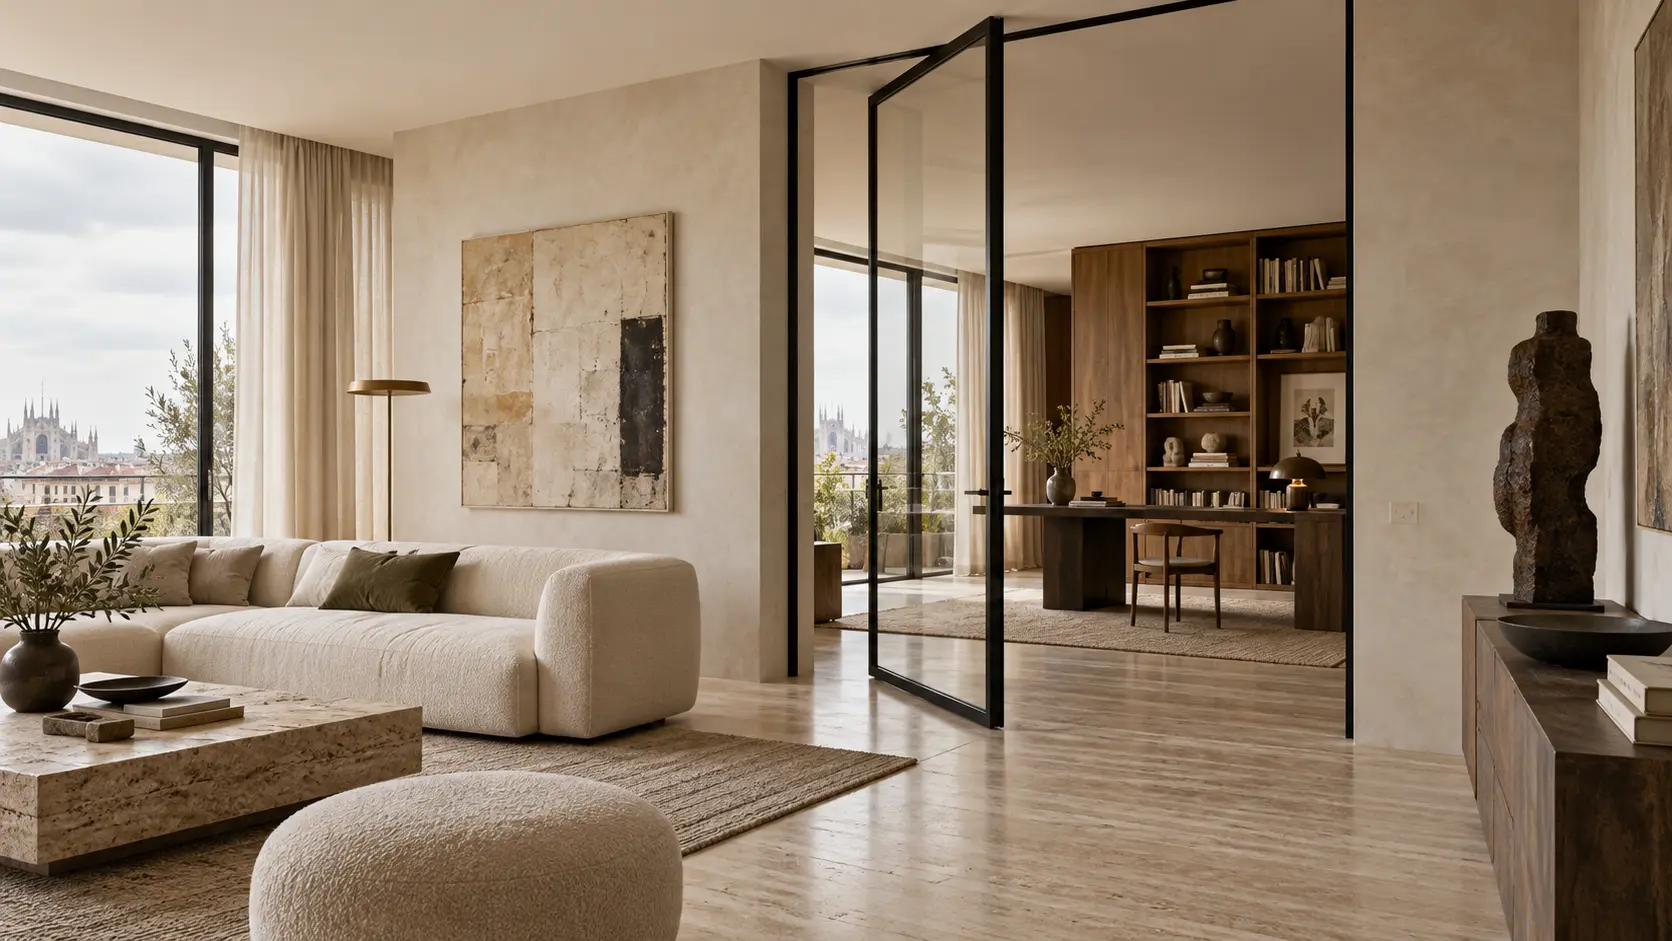
When a large glass leaf turns without visible hinges, the room changes rhythm: the opening becomes an architectural gesture rather than a cut in the wall. The magic is not a stage effect. It lies beneath the floor, inside the frame and in dimensions agreed before screed, glass and steel arrive on site. Designing a pivot door well means making something technically demanding feel entirely natural.
First question: how should the threshold change?
A pivot door is worthwhile when its movement improves experience: linking living room and study, filtering a kitchen, giving an entrance presence or closing without visual weight. The axis need not sit at the edge; moving it creates a short return that swings the other way. Draw both arcs in plan and test furniture, rugs, switches and people. A dramatic leaf that invades daily circulation is an expensive mistake.
Weight does not disappear; it is guided
Glass, profiles, handle and hardware form a mass the pivot must support and control through every opening. Supply the hardware manufacturer with actual size and weight so capacity, closing action, hold positions and axis can be specified. A pivot is not selected from a photograph. Intended movement, frequency and user safety belong in the brief alongside calculations and manufacturers’ instructions.
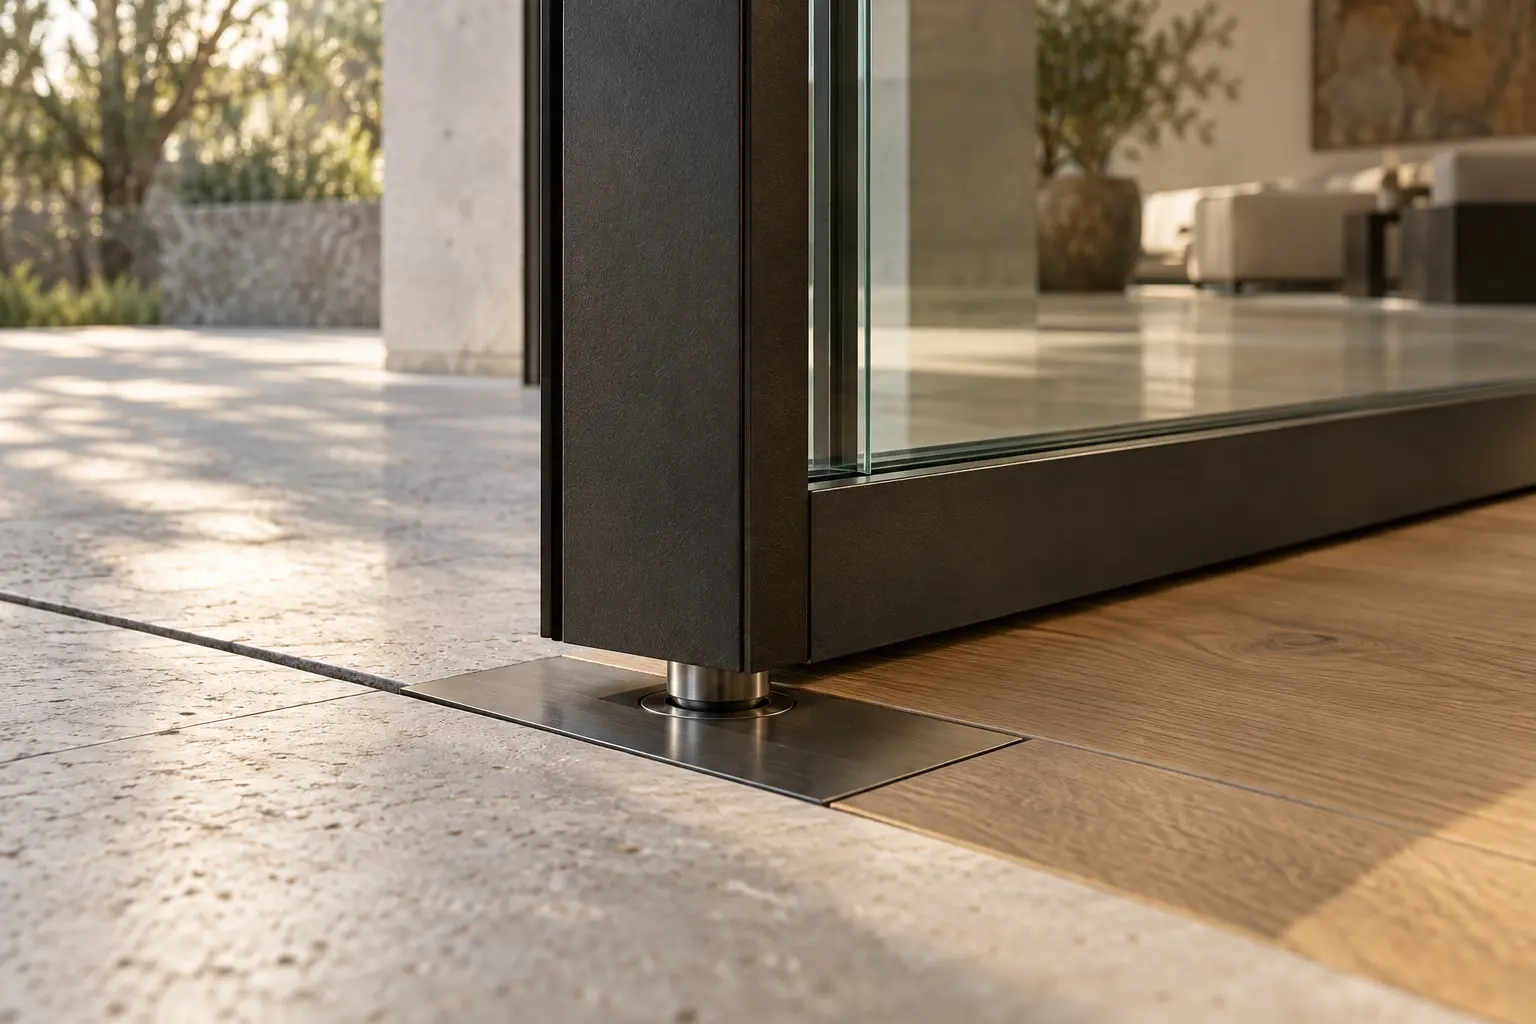
The invisible design sits below the floor
A floor pivot may require a box, plate or fixing prepared before finishes. Coordinate slab, services, screed, underfloor heating and finished level. Alternatives exist when recessing is impossible, but dimensions and performance change. The support must be stable and accessible for adjustment and maintenance: concealed hardware should never become unreachable hardware.
Slim profiles, very real tolerances
A steel frame looks light only when it remains rigid, flat and compatible with the glass. Sections, welds, stiffening, holes and finish are resolved with the workshop before the site is complete. Survey walls and reveals at several points: small plumb errors become obvious beside black profiles and regular joints. Drawings must distinguish design dimensions, measured reality and installation clearances.
Glass determines light, privacy and safety
Clear, low-iron, etched or reeded glass changes depth, reflection and privacy. Safety build-up, thickness and processing depend on size, use and applicable rules and must be specified by competent designers, glaziers and manufacturers. Full-size samples viewed by day and night reduce surprises. Highly transparent glass may need discreet visual manifestation where people could miss the closed leaf.
The threshold should continue, not trip
A large leaf loses elegance when the floor has random cuts or level changes. Align joints, material transitions, lower frame and pivot plate. A nearly invisible threshold demands shared tolerances between floor layer and installer; it is not achieved by omitting necessary joints. Between stone and timber, allow movement, protect edges and plan sequence. The detail must remain composed when the door is open.
Handle, closing and seals tell the story of use
A long vertical pull invites a different gesture from a recessed grip. Test height, side, projection and the touch of metal with a mock-up. Acoustic privacy or odour control may require stops, seals and automatic drops; never assume a pivot seals like a conventional door. Lock, hold position and closing speed must suit children, pets, accessibility and frequency.

Light creates one door by day and another at night
By day, glass extends depth and reveals rooms beyond. At night it becomes more reflective and may expose lamps, screens or areas meant to feel private. Study views from both sides, separate lighting scenes and sources that do not glare on glass. A curtain, more selective glass or a controlled sightline can restore intimacy without losing lightness.
One chain of decisions from survey to installation
Connect plan, elevation, swing diagram, leaf weight, profile schedule, glass, hardware, finishes, floors and installation sequence. Approve samples and workshop drawings before fabrication; recheck dimensions, supports and protection before installation. Engineers, designers, workshop, glazier and installer each retain their professional responsibilities. The result feels simple because no step was left to improvisation.
Useful tools and accessories
Laser distance meter
Useful for checking clear opening, diagonals and relationships with walls and furniture before final surveying.
View on Amazon.itCross-line laser level
Helps reveal plumb errors and floor continuity; it does not replace checks by the installer.
View on Amazon.itDigital caliper
Useful for samples, thicknesses and small details, while workshop and hardware suppliers remain responsible for final tolerances.
View on Amazon.itMicrofibre cloth for glass and metal
Non-abrasive care protects transparency and finish; always confirm products and method with the manufacturer.
View on Amazon.itAdvertising · Some links are Amazon affiliate links. Selection remains editorial and independent.
Explore the project
Glazed wall between kitchen and living room · Hinged or sliding doors · Thresholds between rooms · Bespoke steel stair railing · STEEL PROJECT
Image note: original editorial visuals generated for White Diamond to explore proportions, pivot detailing and light.